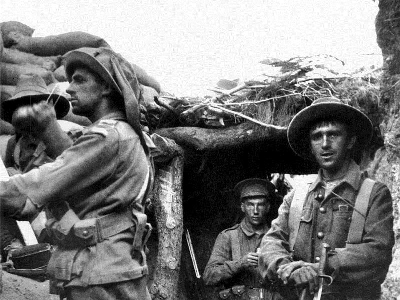
After three long months of stalemate on the Gallipoli peninsula thousands had died in fighting and many more had been wounded. But the summer heat also brought diseases that plagued the men even more. Dysentery, typhoid and cholera…all spread by rotting corpses, human waste and swarming flies.
Given this deteriorating situation, the commander-in-chief, General Sir Ian Hamilton, began to cast around for a place to try and break the deadlock on the peninsula and force a decisive victory. He chose the area north of the Anzac position, where the terrain and Ottoman defences were more open.
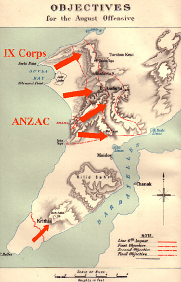
To support the landing of the British Ninth Corps at Suvla Bay, the Anzacs would break out from their northern positions to capture the high points of Chunuk Bair, Hill Q and Hill 971. After taking these heights, the Anzac troops were to move along the ridge back towards their own lines near Baby 700. A simultaneous attack up the Sari Bair Ridge would threaten the Ottoman positions at the Nek and Baby 700. When these two pincers closed, the Allies would control the Sari Bair Range and could use it as base to mount an assault on the Narrows.
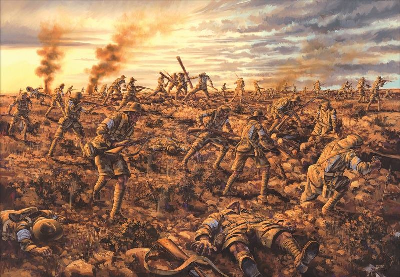
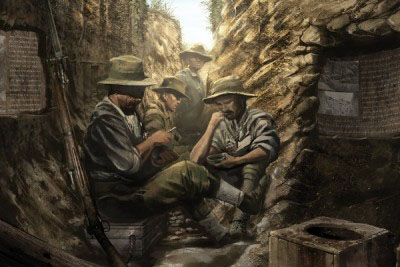
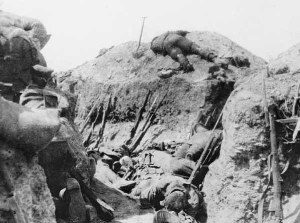
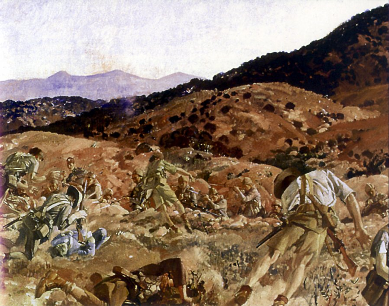
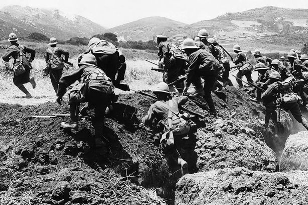
The offensive began on the 6th of August with diversionary attacks at Lone Pine and Quinn’s Post, at the southern end of the Anzac perimeter, and at Cape Helles. At Lone Pine, when men of the 1st Brigade reached the Ottoman trenches they had to pull up the roofing that the Ottoman soldiers had built to protect themselves from the shelling from the Royal Navy at sea. What followed was the fiercest hand-to-hand fighting in which Australians have ever been involved at war. It was too dangerous to fire a rifle for fear of shooting your own side so troops used bayonets, clubs and their own bare fists to gain the ascendancy. The fighting went on over three long days and nights. The conditions in the trenches were appalling with men forced to fight over and around the dead bodies of their mates and enemies. Such was the bravery displayed at Lone Pine, seven Australians were awarded the Victoria Cross for valour. But as a feint to draw Ottoman forces away from the north it was unsuccessful and cost over 2,000 Australian lives.
That evening, two covering forces moved out from the northern Anzac perimeter to capture the foothills up which two assault columns would move on their way to seize Chunuk Bair, Hill Q and Hill 971. The main assault forces, however, soon ran into trouble. The confusion of manoeuvring in darkness over extremely difficult terrain with poor maps caused the assault to fall behind schedule. The Australian 4th Brigade, under John Monash and tasked to take Hill 971, became hopelessly lost in the difficult terrain. Towards dawn, however, some gains were made and Chunuk Bair was nearly reached, but the troops were exhausted by their efforts, and the Ottomans quickly deployed reserve blocking forces.
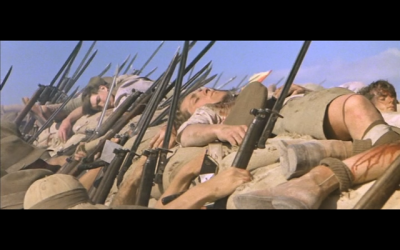
An attack by the 3rd Australian Light Horse Brigade, fighting as infantry, was planned at the Nek for the early morning of 7 August. It was to be coordinated with an attack from the ridge and covered by naval gunfire. But with the reverses at Chunuk Bair and Hill Q, the pincer attack from the direction of Battleship Hill and Baby 700 failed to materialise. Nevertheless, it was hoped that an attack at the Nek would draw Ottoman forces from the assault on the ridge, so the Light Horse charged. The preparatory naval gunfire lifted seven minutes early. The defenders were able to recover and the Australians were mowed down ‘like corn before a scythe’. Four times the Light Horse went over the top, acts of futility that cost 234 dead.
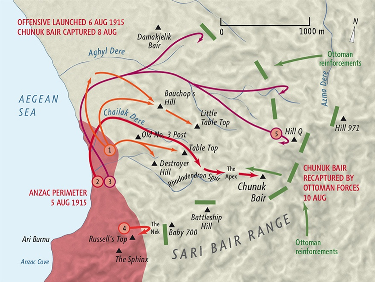
On 7 August the British Ninth Corps landed at Suvla Bay – largely unopposed. When they had secured Suvla Bay, the British planned to support the main attack onto the Sari Bar Ridge.
The offensive was renewed on 8 August. The New Zealand Wellington Battalion finally reached the summit of Chunuk Bair in the early hours of 8 August. They found it unoccupied – the defenders had withdrawn during the night but it was not long before the Ottomans sent troops to retake the position. New Zealand and British units managed to hold the summit until 10 August, when a massive Ottoman attack swept them off Chunuk Bair. Of the 760 soldiers in the Wellington Battalion, 90% were killed or injured.
British forces on the approaches to Hill Q were also driven back. A lone Gurkha battalion reached the top of Hill Q on 9 August, but was unable to hold its position. Further north at Suvla Bay the British assault had also failed to achieve its objectives and the August offensive ground to a halt. Its aims were unrealised, although the perimeter had been expanded considerably with the occupation of Suvla and the expansion of the Anzac positions.

The need to link the positions at Suvla Bay and Anzac prompted attacks on Hill 60 on 21 and 27 August, but both attempts were unsuccessful with heavy casualties. It was the last Allied offensive action on Gallipoli.

The battles of the August Offensive were the largest and most costly in the eight-month-long Gallipoli campaign.
All the allied attacks ended in heartbreaking failure and produced heavy losses on both sides. Many of the sites of the bloody struggle – places such as Lone Pine, The Nek, Chunuk Bair, and Hill 60 – became sadly familiar names in Australia and New Zealand.
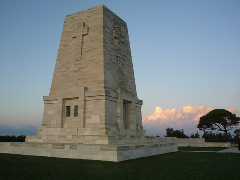
At this time Australia commemorates the centenary of the August Offensive, pausing to reflect on the entire Gallipoli campaign and, particularly, the sacrifice of those Anzacs at the battles of Lone Pine and the Nek. Lest we forget.
Contact Marcus Fielding about this article.